Last updated: August 16, 2026
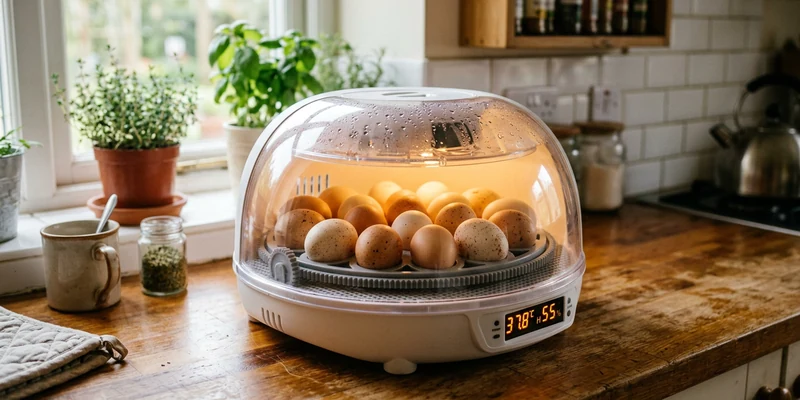
An egg incubator is what turns a dozen fertile eggs from a neighbor’s rooster, or your own flock, into a batch of chicks without waiting on a broody hen to volunteer. Not every hen goes broody when you want one to, and an incubator gives you control over timing that hatching under a hen never does.
The gap between a cheap incubator and a reliable one comes down to how consistently it holds temperature and humidity, and whether it turns the eggs for you. This guide covers what to check before buying an incubator for chicken eggs specifically, rather than a general purpose unit built with reptiles or other species in mind, the models that come up again and again in hatcher feedback, and the mistakes that turn a promising batch of eggs into a disappointing hatch rate.
This article contains affiliate links. If you buy through them, we may earn a commission at no extra cost to you. Learn more.
Quick Answer
Which egg incubator should you buy?
- For a first hatch or a small backyard batch, a digital egg incubator with an automatic egg turner and a temperature display removes most of the guesswork.
- If you plan to hatch regularly or in larger batches, a cabinet style incubator with independent humidity control is worth the extra setup effort.
- Whatever you buy, place it somewhere with a stable room temperature away from direct sunlight and drafts, since ambient swings are one of the most common causes of a poor hatch.
What to Check Before You Buy an Egg Incubator
Every row below can be checked on the product listing before you buy. Getting these right is the difference between a strong hatch rate and a batch of eggs that never make it.
| What to check | Why it matters | What to look for |
|---|---|---|
| Automatic egg turning | Eggs need regular turning, and missing a manual turn hurts the hatch | A built in automatic turner, or a manual cradle if you are confident you will turn eggs consistently |
| Temperature control and display | Chicken eggs need a narrow, stable incubation temperature to develop properly | A digital display with the temperature range stated by the manufacturer, ideally with an alarm for out of range readings |
| Humidity control | Humidity affects moisture loss through the shell and hatch timing | A humidity reading and a refillable water reservoir, with independent control on higher end models |
| Capacity | Determines how many eggs you can set at once | The egg count listed by the manufacturer, matched to how many chicks you actually want |
| Viewing window | Opening the incubator disrupts temperature and humidity | A clear lid or window so you can check on eggs without lifting it |
| Ease of cleaning | Incubators need a full clean between hatches to prevent bacterial buildup | Removable trays and a smooth interior that wipes down easily |
Once chicks hatch, they need supplemental heat right away. Our heat lamp guide covers safe brooder heat sources for the weeks right after hatching.
Styrofoam, Cabinet, and Automatic Turner Models
Entry level incubators are usually a styrofoam or plastic shell with a heating element, a fan for air circulation, and a small footprint suited to a dozen eggs or fewer. They are inexpensive and common as a first incubator, though the lighter construction can make them more sensitive to swings in room temperature than a heavier built unit.
Cabinet style incubators step up in capacity and typically add independent humidity control alongside temperature control, aimed at keepers hatching larger or more frequent batches. Automatic egg turning is available across most price points now, and it matters: an egg that goes untouched for too many hours in a row develops unevenly, and a turner removes that risk without you needing to remember every few hours.
Why Stable Placement Beats a Fancier Incubator
The single biggest variable most first time hatchers underestimate is where the incubator sits, not which model they bought. A spot near a window, an exterior door, or an HVAC vent exposes the incubator to temperature swings that even a good unit struggles to correct for quickly. A stable interior room, away from direct sunlight and drafts, gives any incubator its best chance to hold a consistent reading.
Hatcher feedback consistently points to the same two setup mistakes: opening the incubator too often to check on eggs, which lets heat and humidity escape, and not calibrating or verifying the thermometer against a separate reliable source before a full incubation run. Both are free fixes that matter more than incubator price.
Our Top Picks at a Glance
How we chose: we compared widely available egg incubators on temperature stability, turner reliability, humidity control, and how consistently users report a strong hatch rate across multiple batches. Selections lean on manufacturer specifications and recurring themes in customer reviews rather than any hands-on trial of our own.
🏆 Best Overall
A digital incubator with a built in automatic egg turner, a clear viewing window, and a temperature display, sized for a small to medium backyard batch.

⭐ Upgrade Pick
A model with a more detailed digital display showing both temperature and humidity readings together, giving closer visibility into conditions without opening the lid.

💛 Best Value
A basic incubator without an automatic turner, for hatchers comfortable turning eggs by hand on a consistent schedule and looking to keep costs down.
Picks by Situation: Small Batches and Larger Hatches
Two situations push hatchers toward a different size incubator than the everyday default: a first small experimental batch, and keepers planning to hatch regularly at scale.
🐣 Best for Small Batches
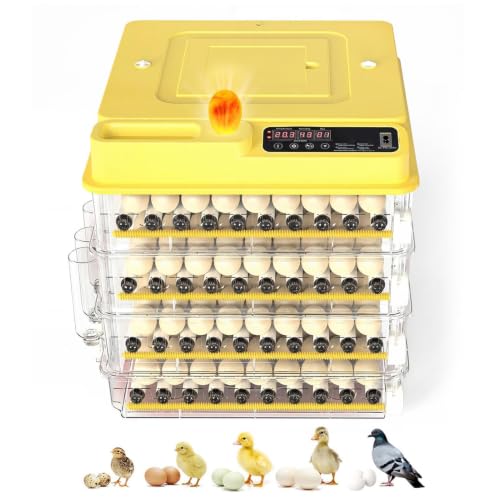
A compact incubator sized for a handful of eggs, well suited to a first hatch, a classroom project, or testing fertility from a new rooster before committing a full batch.

📦 Best for Larger Hatches
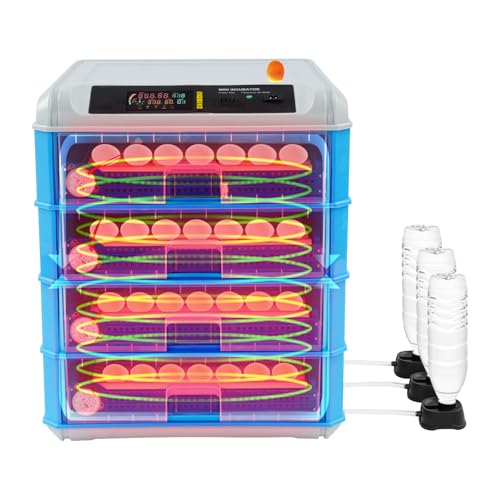
A higher capacity cabinet incubator for keepers hatching regularly or expanding a flock quickly, with room for a full setting rather than a handful of eggs.
Running a Hatch: Setup and What Comes After
Let the incubator run empty for a full day before adding eggs, so you can confirm the temperature and humidity readings are stable and match the manufacturer’s specifications. Set eggs pointed end down, keep the turner running or stick to a consistent manual turning schedule, and resist opening the lid more than necessary, since every open cycle costs heat and humidity that takes time to recover.
Chicks need a warm, safe brooder the moment they hatch and dry off, so have that setup ready before the hatch date, not after. Our heat lamp guide covers safe brooder heat options, and our chicken feed guide covers the starter feed they will need within their first day.
Common Mistakes to Avoid
- Placing the incubator somewhere with unstable temperature. A spot near a window, vent, or exterior door undermines even a good incubator’s ability to hold steady conditions.
- Skipping a dry run before adding eggs. Confirm temperature and humidity readings are stable for a full day before committing real eggs to the batch.
- Opening the lid too often to check on progress. Every open cycle lets heat and humidity escape, and patience matters more than frequent peeking.
- Forgetting to verify the thermometer. A miscalibrated reading can run an entire batch too hot or too cold without any obvious warning sign.
- Not having a brooder ready before hatch day. Chicks need warmth and shelter immediately after hatching, so set up heat and space in advance rather than scrambling once eggs start pipping.
Where to Go From Here
A successful hatch is the start of a new set of needs. Line up brooder heat with our heat lamp guide, plan feed with our chicken feed guide, and if the flock is outgrowing its current space, our large chicken coop guide covers what to look for next.
Frequently Asked Questions
How long does it take to hatch chicken eggs in an incubator? Chicken eggs generally take around three weeks in an incubator, though the exact figure depends on breed and conditions, so follow the timeline in your incubator’s manual and watch for the signs of pipping near the end of the cycle.
Do I need an automatic egg turner? It is not strictly required, but eggs need regular turning for even development, and an automatic turner removes the risk of missing a turn during a busy day or overnight.
Why did my eggs not hatch? Common causes include unstable room temperature around the incubator, incorrect humidity levels, infertile eggs, or a miscalibrated thermometer. Reviewing your setup against the manufacturer’s specifications is the first step in troubleshooting a low hatch rate.
Can I use an egg incubator for other poultry besides chickens? Many incubators handle duck, quail, or other poultry eggs, but temperature, humidity, and incubation length differ by species, so check your specific model’s settings and guidance before mixing species in one batch.
How do I clean an incubator between hatches? Remove and wash trays and the turner mechanism, and wipe down the interior with a mild disinfectant recommended for incubators, letting everything dry fully before the next batch to reduce bacterial buildup.
The Bottom Line
The best egg incubator for most backyard hatchers is a digital model with an automatic turner and a reliable temperature display, placed somewhere with stable room temperature away from drafts and direct sun. Run a dry test before adding eggs, resist opening the lid too often, and have a brooder ready before hatch day arrives.